Nairobi Repair Centre › Electric & Electronic Appliances Repair in Nairobi , Fridge Repair, Cooker, TV, Water Dispenser & More
We provide Nairobi’s top home appliance repair service. To mention a few, we fix electrical and electronic appliances such as dishwashers, ovens, cookers, refrigerators, freezers, tumble dryers, and washer dryers. We also repair washing machines in Nairobi, Kenya. In and around Nairobi, Kenya, we provide repair services. For more information, contact us at 0720170042 if you need to know how much appliance or washing machine repair will cost or if it makes sense to fix your washer, cooker, oven, refrigerator, or dishwasher. Get incredible deals on appliance repair in Nairobi right now!
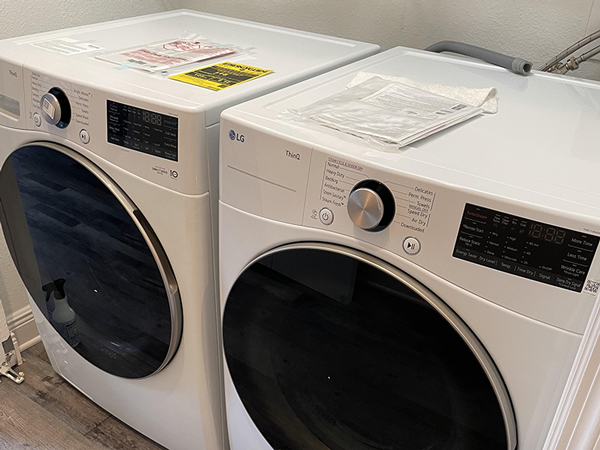
WASHING MACHINE REPAIR IN NAIROBI
Do You need Washing Machine Repair Services and you reside in Nairobi County or its adjacent regions? Has your washing machine unit suddenly stopped working or is failing to perform its function at optimal efficiency? It’s time you reach out for our professional and excellent washing machine repair in Nairobi.
If you have a washing machine at home and it suddenly doesnt respond or work as is supposed to, You would find great use in Calling Nairobi Repair Center. Technicians will have a look at your washing machine. After all, you don’t want to end up with loads of laundry undone. Schedule our washing machine repair services in Nairobi and get the best repair experts in Nairobi. Whether your washing machine stops draining, spinning or washing your clothes properly, our experts can fix all of your washing machine problems in a quick & efficient manner. Got a washing machine unit creating problems? Call our service now.
FRIDGE REPAIR IN NAIROBI AND KIAMBU COUNTIES
When looking for the Best Refrigerator Repair servicesin Nairobi, you can never go wrong with Nairobi Repair Center! Suppose your refrigeration unit doesnt turn on, doesnt cool or cools too much, smells bad or has other issues, Call Nairobi Repair Center for our famed fridge repair in Nairobi , a service that will ensure your fridge gets back to work. Our Refrigeration and cooling systems repair experts have immense skills and will diagnose potential problems with your Fridge. You will be impressed by how reliable the service is! Many of our clients in Nairobi and Kenya find us by Searching for “Fridge Repair Near Me“. Our distributed technicians arrive at your address and fix the Fridge on the same day! Look no further than Nairobi Repair Center for the best Appliance Repair Services. We provide a swift & efficient appliance repair services to our citizens in Nairobi without having them go through any kind of trouble. Now, you don’t have to worry about going to the stores to purchase the finest & the freshest ingredients as with our repairs done, your refrigerator will work at the most optimal efficiency giving every product you store a nice & fresh feel. Let us help maintain good health for you & your family by allowing you to store up groceries in safe recommended temperatures. Call our expert fridge repair in Nairobi Today

You can Rely on Excellent Appliance Repair in Nairobi
If you are looking for the best appliance repair services in Nairobi, “Near Me”, Near you, and you happen to land on this website, look no more. We offer the best appliance repair services at market friendly rates. We will lay out the appliance repair process to you including the cost of diagnosis, repair costs including the prices of necessary parts and spares, and the labour charges.
Dedicated Technicians
Nairobi Repair Center Hosts Dedicated and Experienced Appliance Repair Technicians. You can rely on their services
Fast Appliance Repairs
Appliance Repair Technicians arrive on time, and deliver fast appliance repair services, so you can get back to work!
Friendly Labour Costs
Appliance Repair Labour costs are very friendly and competitive. You will be impressed!
Timely Technician Arrival
A repair technician will typically arrive in no more than 30 minutes after you place a call for help, in Nairoi County
Affordable Spare Parts
Spare Parts Prices are very competitive and pocket friendly, while ensuring that you get the best quality parts
Durable Parts and spares
If you need durable spare parts that last longer, then you are better off choosing to source with Nairobi Repair Center
Espresso Coffee Maker Repair in Nairobi | Fast Service
Best Espresso Machine Repair / Coffee Maker Repair Service in Nairobi Coffee makers, particularly espresso…
Cold Room Repair in Nairobi | Top Service
Cold Room Repair in Nairobi by Nairobi Repair Center When you need reliable Cold room…
Hood Extractor Repair in Nairobi | Best Service
Hood Extractor Repair in Nairobi: Urgent and Reliable Solutions Get the Best, Most Reliable and…
Power Tools Repair in Nairobi | Fast Service!
The Best Power Tools Repair in Nairobi, Urgent and Reliable Solutions Quick and reliable Power…
Top Sewing Machine Repair in Nairobi
The Best Sewing Machine Repair in Nairobi Do you need reliable Sewing Machine Repair in…
Water Pump Repair in Nairobi | Quick Fix
Bestcare Facility Services is proud to offer our specialized and highly reliable “Water Pump Repair…
BEST Cooker Repair in Nairobi
Electric Cooker Repair Services are readily available in Nairobi and throughout Kenya, offered by various…
Best Television Repair in Nairobi
Television repair services play a crucial role in ensuring that your TV functions optimally and…
Washing Machine Repair
Washing Machine Repair Services in Nairobi and Kenya are provided by a range of professional…
Home Theater Repair in Nairobi | A Fast Fix!
WASHING MACHINE REPAIRS is a reputable service provider in Nairobi that specializes in repairing and…
Fast Fridge Repair in Nairobi | Durable Spare Parts
Is your fridge acting up? Are you tired of dealing with spoiled food and inefficient…
Printer Repair in Nairobi | Conveniently Fast!
Are you in search of professional printer repair in Nairobi? Look no further than Repair…
Computer Repair in Nairobi | Best Service
Computer Repair in Nairobi: The BestCare Services Revolutionizing Tech Solutions in Kenya In today’s fast-paced…
Laptop Repair in Nairobi | Best Service
In Nairobi, Kenya, laptop repair services play a crucial role in ensuring the smooth functioning…
Best Water dispenser Repair in Nairobi
We offer water dispenser services in Nairobi including repair, Maintenance, cleaning, installation, parts and spares…
Motor Vehicle Garage Mechanic in Nairobi | Best Service
Nairobi, the capital city of Kenya, is a bustling metropolis with a significant number of…
Electric Generator Repair in Nairobi
Welcome to Best Appliance Repairs in Nairobi, Kenya, where we are your reliable partner in…
Vacuum Cleaner Repair in Nairobi | Quick Fix
You can get great TV repair services in Nairobi, Kenya. Television repair is the process…
We are on Social Media
Follow our Social Media posts and updates and stay informed about Nairobi Repair Center’s Appliance Repair Solutions, Services and Insights. We are on Instagram, Facebook, Twitter X and Threads. You can also see more information about what we do on Nairobi Repair Centre’s Google Business Location. We strive to post useful content periodically and we hope you will find great use for it. Asante Sana!
DISHWASHER REPAIR IN NAIROBI
Suppose your refrigeration unit is failing to preserve food the way it is supposed to. In that case, it’s time you call our fridge repair in Nairobi service to fix your refrigerator permanently. Our appliance repair services in Nairobi has highly skilled experts who can diagnose potential problems in your refrigerator. When it comes to fridge repair in Nairobi, we can provide a reliable service.
Searching for immediate appliance repair services in Nairobi to help you fix up your refrigerator on the same day? Look no further than Bestcare Appliance Repair Services in Nairobi Kenya. We provide a swift & efficient appliance repair services to our citizens in Nairobi without having them go through any kind of trouble. Now, you don’t have to worry about going to the stores to purchase the finest & the freshest ingredients as with our repairs done, your refrigerator will work at the most optimal efficiency giving every product you store a nice & fresh feel. Let us help maintain good health for you & your family by allowing you to store up groceries in safe recommended temperatures. Call our expert fridge repair in Nairobi Today
Very Reliable washing machine repair and refrigerator repair services in Nairobi

Jane Muchai
Westlands, Nairobi Kenya
Quick Fridge Repair Services and Solutions in Karen, Nairobi
ridge Repair Services and Solutions in Karen, Nairobi A refrigerator is an essential appliance for any household, keeping food fresh and safe for consumption. However,…
Fast Washing Machine Repair in Karen, Nairobi
Washing Machine Repair Services and Solutions in Karen, Nairobi Washing machines are indispensable household appliances, but they occasionally face issues that disrupt their efficiency. Residents…
Excellent Fridge Repair Services and Solutions in Kileleshwa
Fridge Repair Services and Solutions in Kileleshwa Refrigerators are essential appliances in every household and business, keeping food fresh and preserving ingredients for long-term use.…
Fridge Repair Services along James Gichuru Road, Lavington
Fridge Repair Services and Solutions Along James Gichuru Road, Lavington Fridges are essential appliances in every home, business, and establishment. When they malfunction, it can…
Where is James Gichuru Road, Lavington, Nairobi Kenya?
James Gichuru Road: A Vital Artery in Nairobi’s Lavington Suburb James Gichuru Road is a significant thoroughfare in Nairobi, Kenya, connecting the affluent Lavington suburb…
Washing Machine Repair Services along James Gichuru Road, Lavington
Washing Machine Repair Services and Solutions along James Gichuru Road, Lavington When your washing machine breaks down, it can be an inconvenience, especially in busy…